构建一个人脸识别系统相对来说还是比较容易的,首先通过人脸检测技术提取出静态的图片和动态的视频当中的人脸部分,再将所提取出的人脸部分输入分类模型做人脸识别。下面我们一步步来进行介绍。
人脸检测
人脸检测用来提取出静态的图片和动态的视频当中的人脸部分,一般使用OpenCV或者dlib自带的人脸检测库就能够达到很好的效果(在实际中,dlib的人脸检测效果比opencv要好,但opencv速度比dlib快很多),当然你也可以自己训练人脸检测模型,我们在后面的章节中会讲到。
图片人脸检测
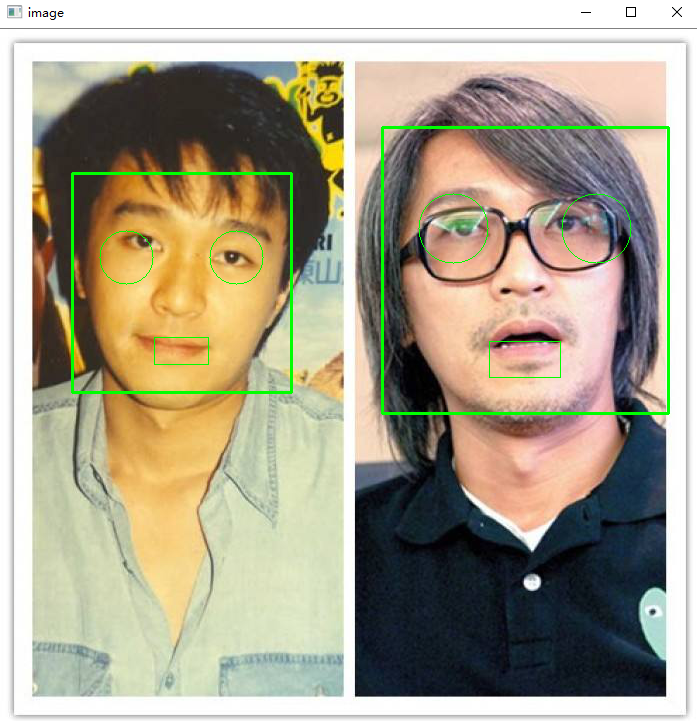
基于OpenCV的图片人脸检测:
img = cv2.imread(filepath)  # 读取图片
gray = cv2.cvtColor(img, cv2.COLOR_BGR2GRAY)  # 转换为灰度图

# OpenCV自带的人脸检测模型
classifier = cv2.CascadeClassifier("opencv_model/haarcascade_frontalface_default.xml")
# 人脸检测
faceRects = classifier.detectMultiScale(gray, scaleFactor=1.2, minNeighbors=3, minSize=(32, 32))
# 如果检测到人脸(一张图片上可能检测到多张),就用矩形框出来
for faceRect in faceRects:
    x, y, w, h = faceRect
    # 框出人脸
    cv2.rectangle(img, (x, y), (x + h, y + w), color, 2)
最终效果如下:

基于dlib的图片人脸检测:
# 首先安装dlib
pip3 install dlib
img = cv2.imread(path)
gray = cv2.cvtColor(img, cv2.COLOR_BGR2GRAY)

# dlib自带的人脸检测器
detector = dlib.get_frontal_face_detector()
# 人脸检测
dets = detector(gray, 1)
for face in dets:
    # 伪代码
    x, y, w, h = face.top(), d.bottom(), d.left(), d.right()
    # 框出人脸
    cv2.rectangle(img, (x, y), (x + h, y + w), color, 2)
视频人脸检测
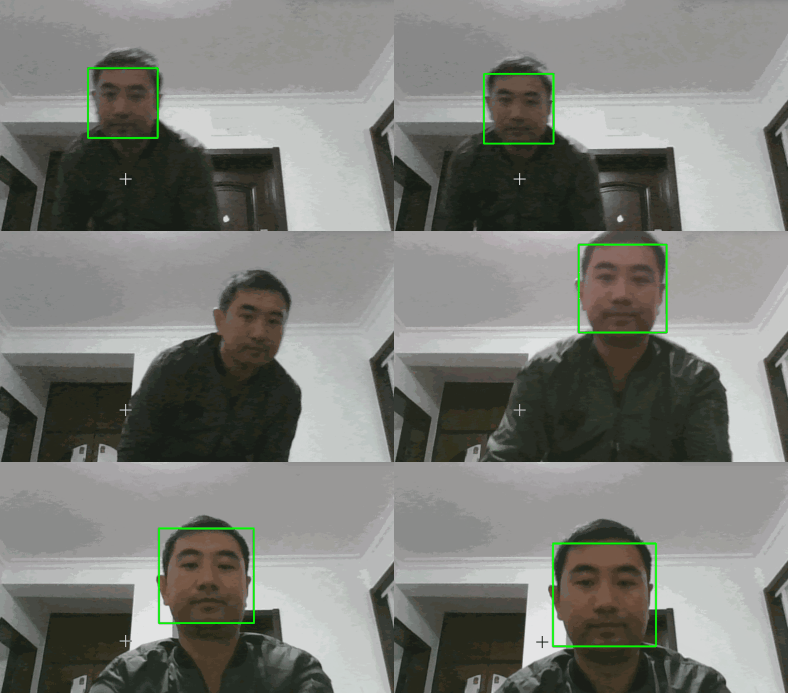
视频人脸检测是在图片人脸检测的基础上进行的。其实现思路是,调用电脑的摄像头把摄像的信息逐帧分解成图片,或者直接将某段视频逐帧分解成图片,再基于上面讲到的图片人脸检测技术标识出人脸的位置,最后把处理的图片逐帧绘制给用户。
# 获取本机的第一个摄像头
cap = cv2.VideoCapture(0)
while (1):
    ret, img = cap.read()  # 逐帧获取摄像图片
    face_rec(img)  # 图片人脸检测方法封装
    if cv2.waitKey(1) & 0xFF == ord('q'):  # 按下q键停止摄像
        break
cap.release()  # 释放摄像头
最终效果如下(图片来源于网络):

人脸识别
通过上面的人脸检测技术检测到人脸部分以后,下一步就是将所提取出的人脸部分输入分类模型做人脸识别。可以用开源的face_recognition库(不需要训练人脸识别模型),也可以自己重新训练人脸识别模型,下面将分别进行介绍。
使用face_recognition库进行人脸识别
face_recognition的原理其实就是我们之前在迁移学习章节中讲过的one-shot、few-shot learning,先在大规模人脸数据集上预训练match model,然后迁移到目标领域,所以只需要提供一张或者数张目标领域的图像作为训练数据,将待识别人脸与训练数据通过face_recognition提供的预训练match model进行比对,取match score最高的人脸图像,即完成了人脸识别,不需要任何训练步骤。
path = "img/face_recognition/"  # one-shot learning训练数据图片目录

total_image_name = []
total_face_encoding = []

# 遍历训练数据图片
for fn in os.listdir(path):
    # 图片加载
    face = face_recognition.load_image_file(path + "/" + fn)
    # 图片encode
    face_encode = face_recognition.face_encodings(face)

    total_face_encoding.append(face_encode[0])
    total_image_name.append(fn[:(len(fn) - 4)])  # 截取人名

# 人脸检测
face_locations = face_recognition.face_locations(unknown_img)  # unknown_img为待识别图片
face_encodings = face_recognition.face_encodings(unknown_img, face_locations)
# 检测到的所有人脸
for (top, right, bottom, left), face_encoding in zip(face_locations, face_encodings):
    for i, v in enumerate(total_face_encoding):
        # 与训练数据一一做match
        match = face_recognition.compare_faces([v], face_encoding, tolerance=0.5)
        name = "Unknown"
        # 如果match上,立即取出人名
        if match[0]:
            name = total_image_name[i]
            break
训练人脸识别模型
如果觉得face_recognition库进行人脸识别的效果不是特别好,我们完全可以自己训练人脸识别模型。步骤如下:
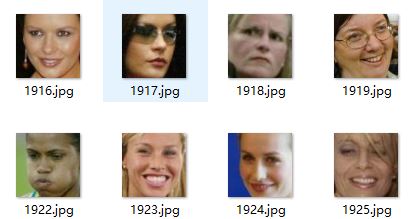
- 首先是数据获取,可以去网上获取一批人脸数据,比如lfw.tgz,然后自己坐在电脑面前不停摆拍获取自己的脸部图像,并做数据增广。
- 通过人脸检测提取人脸部分,并存储。
 gray_img = cv2.cvtColor(img, cv2.COLOR_BGR2GRAY)
 faces = haar.detectMultiScale(gray_img, 1.3, 5)
 for f_x, f_y, f_w, f_h in faces:
     face = img[f_y:f_y+f_h, f_x:f_x+f_w]
     cv2.imwrite(out_dir+'/'+str(n)+'.jpg', face)
- 模型训练,还是用经典的LeNET网络。
keep_prob = tf.placeholder(dtype=tf.float32, shape=[], name='keep_prob') images = tf.placeholder(dtype=tf.float32, shape=[None, 64, 64, 3], name='image_batch') labels = tf.placeholder(dtype=tf.int64, shape=[None], name='label_batch') is_training = tf.placeholder(dtype=tf.bool, shape=[], name='train_flag') conv3_1 = slim.conv2d(images, 64, [3, 3], 1, padding='SAME', scope='conv3_1') max_pool_1 = slim.max_pool2d(conv3_1, [2, 2], [2, 2], padding='SAME', scope='pool1') conv3_2 = slim.conv2d(max_pool_1, 128, [3, 3], padding='SAME', scope='conv3_2') max_pool_2 = slim.max_pool2d(conv3_2, [2, 2], [2, 2], padding='SAME', scope='pool2') conv3_3 = slim.conv2d(max_pool_2, 256, [3, 3], padding='SAME', scope='conv3_3') max_pool_3 = slim.max_pool2d(conv3_3, [2, 2], [2, 2], padding='SAME', scope='pool3') conv3_4 = slim.conv2d(max_pool_3, 512, [3, 3], padding='SAME', scope='conv3_4') conv3_5 = slim.conv2d(conv3_4, 512, [3, 3], padding='SAME', scope='conv3_5') max_pool_4 = slim.max_pool2d(conv3_5, [2, 2], [2, 2], padding='SAME', scope='pool4') flatten = slim.flatten(max_pool_4) fc1 = slim.fully_connected(slim.dropout(flatten, keep_prob), 1024, activation_fn=tf.nn.relu, scope='fc1') logits = slim.fully_connected(slim.dropout(fc1, keep_prob), FLAGS.num_people, activation_fn=None, scope='fc2') loss = tf.reduce_mean(tf.nn.sparse_softmax_cross_entropy_with_logits(logits=logits, labels=labels)) accuracy = tf.reduce_mean(tf.cast(tf.equal(tf.argmax(logits, 1), labels), tf.float32)) optimizer = tf.train.AdamOptimizer(learning_rate=0.001) train_op = slim.learning.create_train_op(loss, optimizer) probabilities = tf.nn.softmax(logits) - 模型训练完成后,就可以在线调用模型提供的人脸识别服务,完成人脸识别任务了。
参考资料:
社群
- 微信公众号
